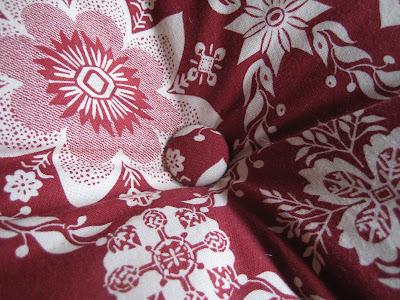
Today I made a long pillow to go on a bench in my living room. It involved beautiful fabric, covered buttons and a new fancy sewing technique for me. Beware. This post has a lot of visual information (ahem, photos) and if you are easily overstimulated by too many photos, a quick scan would give you the general idea.
After covering two buttons in less than two minutes, I thought it would be handy to have a little tutorial on how to do it. Mostly I wanted to do this because I didn't think you would believe me about how easy it is to cover buttons.
Here are all of the supplies. All but the fabric is bought in a little package at the fabric store for like $2. Let me introduce you. From left to right: square of fabric, mold, button top, button back, and pusher. Yup. He is called a pusher.

Step 1: smush the square of fabric into the mold. That's me in this photo!

Step 2: Insert button top into mold.

Step 3: Trim away a little of the excess fabric.

Step 4: Tuck in the remaining excess fabric and pop in the button back.

Step 5: Use the pusher to snap button back onto button top with excess fabric neatly hiding in between.

Step 6: Pop the newly covered button from the mold. Take a bow.

Here is the long pillow and the covered buttons.

Sewing the covered buttons onto the pillow was the grueling part. I will not lie. This was the part in the process that my normally grandmotherly demeanor was overtaken with choice vocabulary. Don't you worry though. Andrew was napping. It was the third finger prick that sent me over the edge. In order to sew buttons onto pillow so they have this neat indented look you have to attach a button to the back of the pillow and then fish around with your needle through the stuffing looking for the pretty covered button on the other side. I have ten fingers. There was one button the needle was looking for. The odds were not in my favor and I have the finger pricks to prove it.

But it sure looks nice doesn't it? The first one was the worst and then the other 3 involved less pricking and more success...which I must say, I am a fan of.

In other news: I made a cheesecake.

Who's coming over for a slice of cheesecake and to compliment my new pillow?


9 comments:
I'm impressed as usual. I actually think I could handle the fabric button thing (after such great visual and written instruction), but not the rest. So, if you need an assistant sometime, I will be in charge of parts 1 through 6.
Who makes long pillows and cheesecake in the same day?
All I did today was sub for a room full of rowdy 2nd graders.
You know, Tara...you might win this one...subbing is much harder than cheesecake and buttons!
Sheesh, Robyn! You wonder why I dont' blog more? It's because you are PREGNANT and you made that awesome pillow AND a cheesecake today. My day: leftovers, lunch out with the kids (because I was too lazy to bring them home to do it) and wondering if I absolutely have to put my futon back together.
Funny: the first thing I thought when glancing at those hand-made buttons was that they seemed so difficult and I wondered how I could learn... Thanks for the step-by-step tutorial!
Luckily your fabric is a lovely dark red to hide most evidence of spilled blood.
Vanessa,
Great point! I should recommend red fabric to people thinking of doing the indented button thing!
Your house is prettier and your tummy much more satisfied!
I loved the red fabric comment!!
Your pillow looks beautiful, Robyn!
gorgeous!
too bad we have the stomach virus or we would be all over the cheesecake (well not my little ones) but totally me!
Post a Comment